
Two Halloweens ago, I stood in my kitchen at 9 p.m. the night before my daughter’s class party, piping royal icing spiderwebs onto two dozen cupcakes and wanting to cry a little. The cupcakes looked fine, but it had taken almost three hours, and I still needed to figure out what we were eating for dinner. That was the year I decided Halloween desserts needed to get simpler, not fancier.
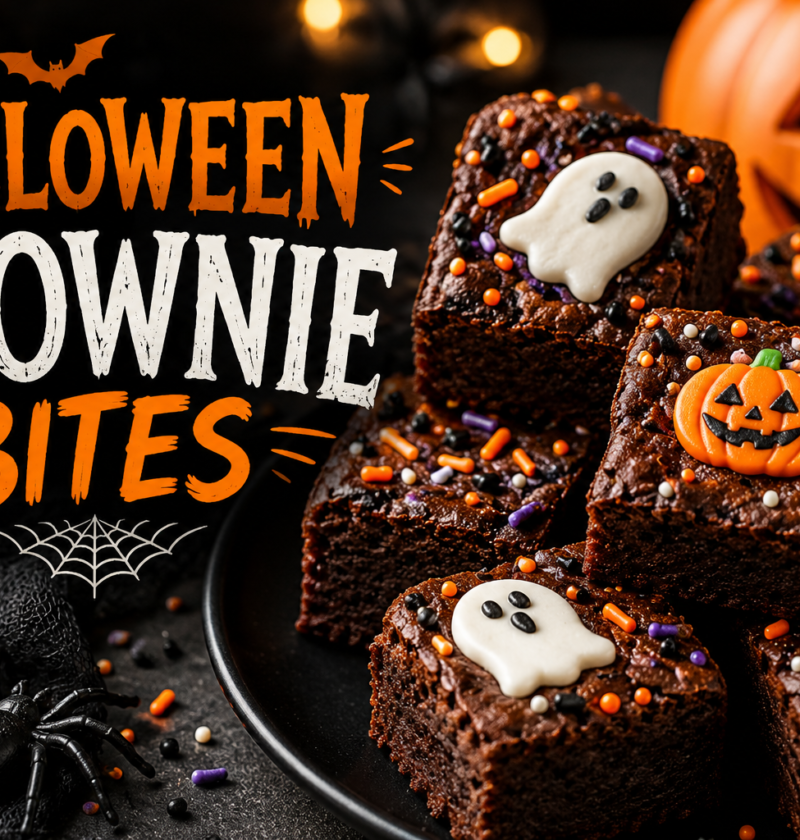
The next year, I made Halloween Brownie Bites instead, and it changed how I think about party desserts entirely. They’re small, one-bite brownies baked in a mini muffin pan, and they take a fraction of the decorating time that cupcakes do. There’s no frosting swirl to perfect, no cake layers to level, and no fondant to fight with. You bake a simple fudgy brownie batter, let it cool, and add a quick Halloween touch — candy eyes, a drizzle of white chocolate, some orange sprinkles — and you’re done.
What I like most is that guests can just pick one up with their fingers. No plates, no forks, no balancing a slice of cake on a napkin while holding a drink. At a party where people are standing around chatting, that matters more than you’d think.
This recipe is the one I’ve settled on after making these bites for three Halloweens in a row, adjusting the baking time, the pan-filling amount, and the decorating steps until I stopped getting dry edges or brownies that stuck to the pan. I’ll walk you through exactly what I do, including the mistakes I made along the way so you don’t have to repeat them.
Why This Has Become My Go-To Halloween Dessert
A few reasons these have stuck around in my regular rotation:
- They’re fast to put together. The batter comes together in one bowl with a whisk — no mixer required.
- The portion size is right for parties. One or two bites satisfies most people, which also means less waste at the end of the night.
- Decorating is genuinely simple. You don’t need piping skills. A spoon, a few candy eyes, and some sprinkles get you most of the way there.
- They hold up well made ahead. I usually bake the brownies a day or two before Halloween and decorate the morning of.
- The chocolate flavor is rich enough to stand on its own, so even the plain, undecorated ones disappear fast.
Around this same time of year, I’m also usually juggling regular dinners, Halloween treats for school, and whatever we’re doing that weekend. I started using the Meal Planning Made Easy E-books a while back just to keep weekly dinners organized so that baking projects like this one don’t derail the rest of the week. It’s a small thing, but not having to think about dinner while I’m also thinking about brownies makes October a lot less chaotic.
Ingredients
This recipe makes about 24 mini brownie bites. Here’s what you’ll need and why each ingredient matters.
Dry ingredients:
- ¾ cup all-purpose flour (95g) — gives the brownies enough structure to hold their shape without making them cakey
- ½ cup unsweetened cocoa powder (45g) — for the deep chocolate flavor; use a good-quality one if you have it, since it’s doing a lot of the flavor work
- ¼ teaspoon salt (1.5g) — balances the sweetness and makes the chocolate taste more pronounced
- ½ teaspoon baking powder (2g) — just enough lift so the bites aren’t dense
Wet ingredients:
- ½ cup unsalted butter, melted (113g) — melted butter, rather than creamed, is part of what keeps these fudgy instead of cakey
- 1 cup granulated sugar (200g)
- 2 large eggs, room temperature
- 1 teaspoon vanilla extract (5ml)
Mix-ins:
- ½ cup semi-sweet chocolate chips or chopped chocolate (85g) — optional, but I almost always include them for pockets of melted chocolate
Decorating:
- Halloween sprinkles (orange, black, purple, or a mix)
- Candy eyes
- ½ cup white chocolate or white candy melts, for drizzling (85g)
- Optional: a few tablespoons of chocolate melts or icing in Halloween colors
Substitutions: If you don’t have semi-sweet chocolate chips, dark chocolate works well and makes the brownies slightly less sweet. If you’re out of white candy melts for the ghost decorations, white chocolate chips melted with a teaspoon of shortening will drizzle similarly. Boxed brownie mix can be used instead of a from-scratch batter — I address that more in the FAQ section below.
Equipment
- Two mixing bowls (one for dry ingredients, one for wet)
- Whisk
- Rubber spatula
- Measuring cups and spoons, or a kitchen scale
- A 24-cup mini muffin pan (or a standard 9×9-inch baking pan — see notes in the instructions)
- Parchment paper or mini muffin liners (liners are optional but make removal easier)
- Cooling rack
- A small spoon or a zip-top bag with the corner snipped off, for drizzling
A stand mixer isn’t necessary here. This batter is simple enough to whisk by hand, which is part of why the recipe comes together quickly.
Step-by-Step Recipe
1. Preheat and prep the pan. Preheat your oven to 350°F (175°C). Grease your mini muffin pan well, even if it’s nonstick — this is the step I skipped the first time I made these, and half my brownies stayed behind in the pan. If you have paper liners sized for mini muffin pans, those work too and make cleanup easier.
2. Melt the butter. Melt the butter until it’s fully liquid, either in the microwave in 20-second bursts or in a small saucepan over low heat. You’re not browning it — just melting it smoothly with no solid bits left.
3. Mix the wet ingredients. In a bowl, whisk the melted butter and sugar together until combined. Add the eggs one at a time, whisking after each addition, then stir in the vanilla. The mixture should look glossy and slightly thickened.
4. Combine the dry ingredients separately. In a second bowl, whisk together the flour, cocoa powder, salt, and baking powder. Whisking the dry ingredients on their own helps break up any cocoa clumps before they hit the wet mixture.
5. Bring it together. Add the dry ingredients to the wet ingredients and fold them in with a spatula until just combined. Stop as soon as you don’t see streaks of flour. Overmixing at this stage is one of the most common reasons brownies turn out tough instead of fudgy. Fold in the chocolate chips last, if using.
6. Fill the pan. Spoon about 1 tablespoon of batter into each mini muffin cup, filling them roughly two-thirds full. Any more than that and they’ll dome up too much and be harder to decorate evenly on top.
7. Bake. Bake for 10–12 minutes. Because these are small, they bake much faster than a full pan of brownies, and it’s easy to overbake them if you’re used to a longer bake time. Start checking at the 10-minute mark. They’re done when the tops look set and slightly cracked and a toothpick inserted in the center comes out with a few moist crumbs — not wet batter, but not completely clean either. A totally clean toothpick usually means they’ve gone a bit too long.
8. Cool before removing. Let the brownie bites cool in the pan for about 10 minutes. This matters more than it seems — pulling them out too early is how they fall apart, since they’re still finishing their set as they cool. After 10 minutes, run a small knife around the edges and lift them out onto a cooling rack.
9. Cool completely before decorating. Let them cool fully, about 30 minutes to an hour, before you add any decorations. Warm brownies will melt candy eyes and make icing slide right off.
Halloween Decorating Ideas
None of these require piping skills. I’ve made all five with nothing more than a spoon and a steady hand.
1. Classic Candy-Eye Brownie Bites
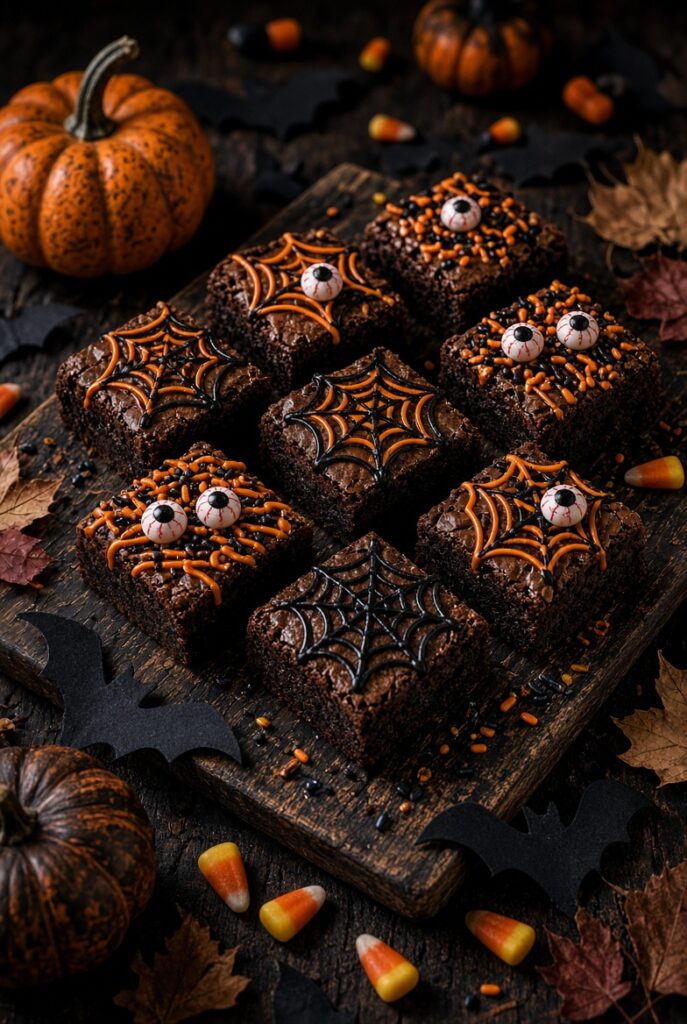
Dab a small amount of melted white chocolate or candy melt onto the brownie top as “glue,” then press one or two candy eyes into it while it’s still wet. This is the easiest option and usually my go-to when I’m short on time.
2. Halloween Sprinkle Brownie Bites
Brush the top of each cooled brownie lightly with melted chocolate, then immediately dip it into a bowl of orange, black, and purple sprinkles. The chocolate acts as glue so the sprinkles stick evenly.
3. Spider Brownie Bites
Drizzle melted chocolate back and forth over the brownie in a rough web pattern using a spoon or a zip-top bag with the corner snipped off, then add two candy eyes near one edge to suggest a spider peeking out. It doesn’t need to look precise — the imperfect drizzle actually reads as more spider-like.
4. Ghost Brownie Bites
Spoon a small circle of melted white chocolate or white candy melt onto the top of the brownie, letting it spread slightly on its own into a rounded shape. While it’s still wet, add two small dots of melted dark chocolate for eyes. Let it set for at least 15 minutes before touching.
5. Monster Brownie Bites
Use green, purple, or orange candy melts as a base coat, then add candy eyes (one or several, for a fun “one-eyed monster” look) and a few small dots of a contrasting color for texture. This is the one my kids like designing themselves.
My Best Tips for Perfect Brownie Bites
- Measure your flour by spooning it into the measuring cup and leveling it off, rather than scooping directly from the bag — scooping packs in extra flour and dries out the brownies.
- Don’t overmix once the flour goes in. Stop as soon as the streaks disappear.
- Watch the clock closely in the oven. Mini brownies can go from perfectly fudgy to overbaked in about two minutes.
- Grease the pan generously, even nonstick pans, or use liners.
- Let the brownies cool in the pan for the full 10 minutes before removing them.
- Let them cool completely before decorating, or your toppings will slide or melt.
- Use a zip-top bag with a small corner snipped off for drizzling instead of trying to pour directly from a bowl — it gives you much more control.
- If you want especially clean edges for a photo or a dessert board, chill the brownies for 20 minutes before slicing or arranging.
- Let any melted chocolate decorations fully set (about 15–20 minutes) before stacking the brownies in a container.
- If you’re freezing brownies for later, thaw them fully at room temperature before decorating — trying to decorate a partially frozen brownie usually ends with cracked icing.
What Can Go Wrong With Brownie Bites?
Dry brownies: Usually caused by overbaking or too much flour. Check at the 10-minute mark and measure flour carefully.
Raw or gummy centers: If the middle still looks wet after 12 minutes, give them another minute or two, checking often. Every oven runs slightly differently.
Sticking to the pan: Grease the pan more heavily than you think you need to, or switch to liners.
Crumbly brownies: This usually means they were slightly overbaked, or removed from the pan before fully cooling. Let them rest the full 10 minutes.
Decorations sliding off: The brownie was still warm. Wait until it’s fully cool.
Uneven sizes: Use a tablespoon or small cookie scoop to portion the batter evenly rather than eyeballing it.
Brownies breaking while removing them: Run a thin knife around the edge first, and don’t rush — lift gently rather than popping them out.
Make-Ahead Instructions
I almost never decorate these the same day I bake them, mostly because I don’t have three free hours in a row during Halloween week. Here’s how I split up the work:
- Bake the brownies up to 2 days ahead. Store them in an airtight container at room temperature once fully cooled.
- Decorate the day of, or the day before, your event. Decorations like candy eyes and drizzled chocolate hold up fine overnight once set.
- If you’re freezing them, freeze before decorating. Undecorated brownies freeze better than decorated ones, since candy eyes and icing can get a little dull or slightly damp after thawing.
This is another spot where having the rest of the week’s meals planned out helps me — I can carve out an hour for decorating without also trying to figure out what’s for dinner. That’s honestly the main reason I still use the Meal Planning Made Easy E-books during busy holiday stretches like this one.
Storage
Room temperature: Store in an airtight container for up to 3 days. This works well if they’re not decorated with anything perishable.
Refrigerator: If your kitchen runs warm, or the brownies are decorated with a lot of melted chocolate, refrigerating in an airtight container for up to 5 days keeps them firmer.
Freezer: Undecorated brownie bites freeze well for up to 2 months. Freeze them in a single layer on a tray first, then transfer to a freezer bag or container once solid, so they don’t stick together.
To prevent decorations from getting damaged in storage, use a container with enough height that nothing presses down on the tops, and avoid stacking decorated brownies directly on top of each other until the decorations are fully set.
Serving Ideas
I’ve served these at:
- Halloween dessert tables, alongside a few other bite-sized treats
- Kids’ parties, where the no-fork setup is genuinely useful
- Family movie nights during October
- A dessert board with pretzels, popcorn, and a few other Halloween snacks arranged around the brownies
They also travel well on a simple cookie tray if you’re bringing dessert to a school or community event.
Batch Planning for a Crowd
This recipe as written makes about 24 bites, which is a good amount for a small gathering. For a party-sized batch, I usually double the recipe, which gives you close to 48 bites — enough for most home parties. If you’re feeding a larger group, tripling works, but keep two things in mind:
- You’ll need multiple mini muffin pans, or you’ll be baking in batches. Don’t try to stretch one pan’s worth of batter across a much bigger portion just to save time.
- Baking time stays roughly the same per batch, since you’re still baking small portions — it’s the number of batches that increases, not the time per batch.
If you’d rather avoid multiple batches altogether, you can bake the batter in a 9×9-inch pan instead and cut it into small squares once cooled, though the texture will be very slightly different from the mini muffin version, with less crisp edge per bite.
Transporting Decorated Brownie Bites
To keep decorations intact on the way to a party, I use a shallow container with a lid rather than a deep one, so nothing shifts or slides during the drive. Arranging them in a single layer, rather than stacking, protects the tops best. If you do need to stack, wait until decorations are completely set (usually a couple of hours after decorating) and separate layers with a piece of parchment paper.
Frequently Asked Questions
Can I make Halloween Brownie Bites ahead of time? Yes. Bake them up to 2 days ahead and store at room temperature, then decorate closer to when you’re serving them.
How do I keep brownie bites fudgy? Don’t overbake them, measure your flour carefully, and use melted (not creamed) butter in the batter.
Can I use boxed brownie mix? Yes, a boxed mix works fine for this format. Just fill the mini muffin cups about two-thirds full and start checking for doneness a couple of minutes earlier than the box suggests, since mini portions bake faster than a full pan.
Can I freeze Halloween Brownie Bites? Yes, undecorated brownies freeze well for up to about 2 months. Decorate them after they’ve thawed.
How do I stop brownie bites from sticking? Grease the pan generously, even if it’s nonstick, or use mini muffin liners.
What decorations can I use if I don’t have candy eyes or specialty decorations? Melted chocolate drizzle, Halloween-colored sprinkles, or a simple dusting of orange or black sanding sugar all work well without any special supplies.
How long should brownie bites cool before decorating? About 30 minutes to an hour, until they’re completely cool to the touch.
Can I make these without a mini muffin pan? Yes. Bake the batter in a 9×9-inch pan and cut it into small squares once cooled.
How do I transport decorated brownie bites? Use a shallow container so they sit in a single layer, and make sure decorations are fully set before packing them up.
How long do Halloween Brownie Bites stay fresh? About 3 days at room temperature, up to 5 days refrigerated, or up to 2 months frozen (undecorated).
Recipe Card
Recipe Name: Halloween Brownie Bites
Description: Rich, fudgy mini brownies baked in a muffin pan and topped with simple Halloween decorations — an easy, bite-sized dessert for parties, school events, or casual fall snacking.
Prep Time: 15 minutes Cook Time: 12 minutes Cooling Time: 40 minutes Total Time: About 1 hour 10 minutes Servings: 24 bites Yield: 24 mini brownie bites Estimated Cost: Roughly $6–8 for the base recipe, depending on decorations used Calories: Nutritional values will vary depending on the decorations and exact ingredients used, so I’m not including a specific number here.
Equipment:
- Mini muffin pan (24-cup)
- Mixing bowls
- Whisk
- Rubber spatula
- Measuring cups/spoons or kitchen scale
- Cooling rack
- Small spoon or zip-top bag for drizzling
Ingredients:
- ¾ cup (95g) all-purpose flour
- ½ cup (45g) unsweetened cocoa powder
- ¼ tsp (1.5g) salt
- ½ tsp (2g) baking powder
- ½ cup (113g) unsalted butter, melted
- 1 cup (200g) granulated sugar
- 2 large eggs, room temperature
- 1 tsp (5ml) vanilla extract
- ½ cup (85g) semi-sweet chocolate chips (optional)
- Halloween sprinkles, candy eyes, white chocolate/candy melts for decorating
Instructions:
- Preheat oven to 350°F (175°C) and grease a mini muffin pan.
- Melt the butter until smooth.
- Whisk melted butter and sugar, then add eggs one at a time and stir in vanilla.
- In a separate bowl, whisk flour, cocoa powder, salt, and baking powder.
- Fold dry ingredients into wet ingredients until just combined; fold in chocolate chips.
- Fill each muffin cup about two-thirds full.
- Bake 10–12 minutes, until tops look set and a toothpick comes out with a few moist crumbs.
- Cool in the pan for 10 minutes, then transfer to a cooling rack.
- Cool completely (30–60 minutes) before decorating.
Notes: Don’t overmix the batter once the flour is added, or the brownies will turn out tougher instead of fudgy. Small brownies bake fast, so start checking a couple of minutes before the timer goes off.
Storage: Airtight container at room temperature for up to 3 days, or refrigerated for up to 5 days.
Freezing: Freeze undecorated brownies in a single layer, then transfer to a freezer container for up to 2 months. Thaw completely before decorating.