
Introduction
Every October, I hit the same wall. I want something pumpkin-flavored on my counter — something that looks like it belongs on a fall dessert table — but I do not want to spend my afternoon babysitting a water bath or worrying about cracks running across the top of a baked cheesecake. If you have ever pulled a pumpkin cheesecake out of the oven only to watch the center sink as it cools, you know exactly the frustration I mean.
That is how I ended up leaning on this no-bake pumpkin swirl cheesecake. It solves the actual problem: you get the creamy, tangy cheesecake layer, a warmly spiced pumpkin layer, and a buttery graham cracker crust, and none of it requires turning on the oven for the filling. The crust is the only part that even flirts with heat, and even that is optional.
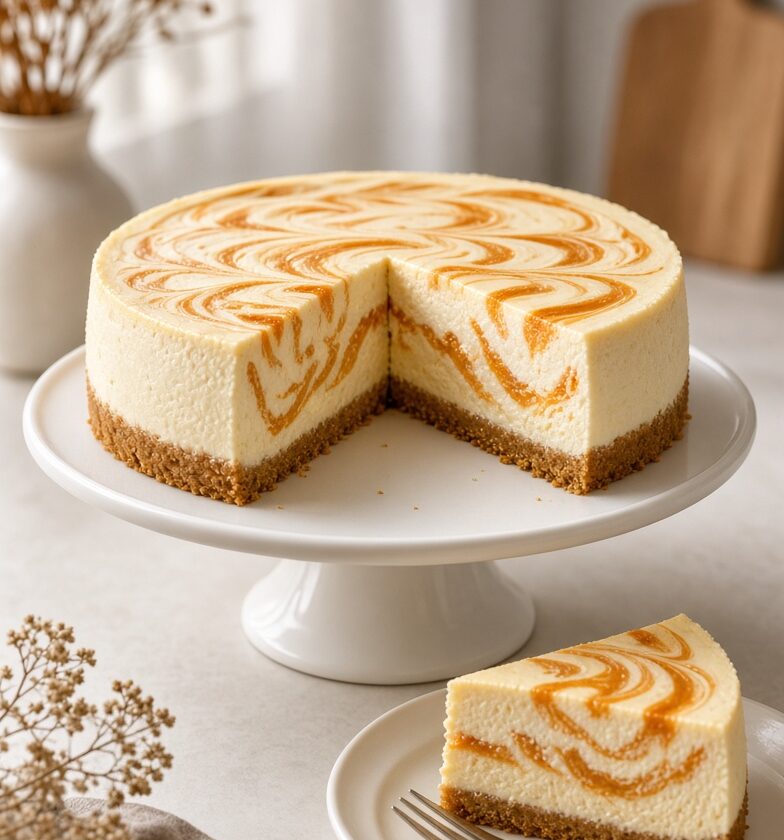
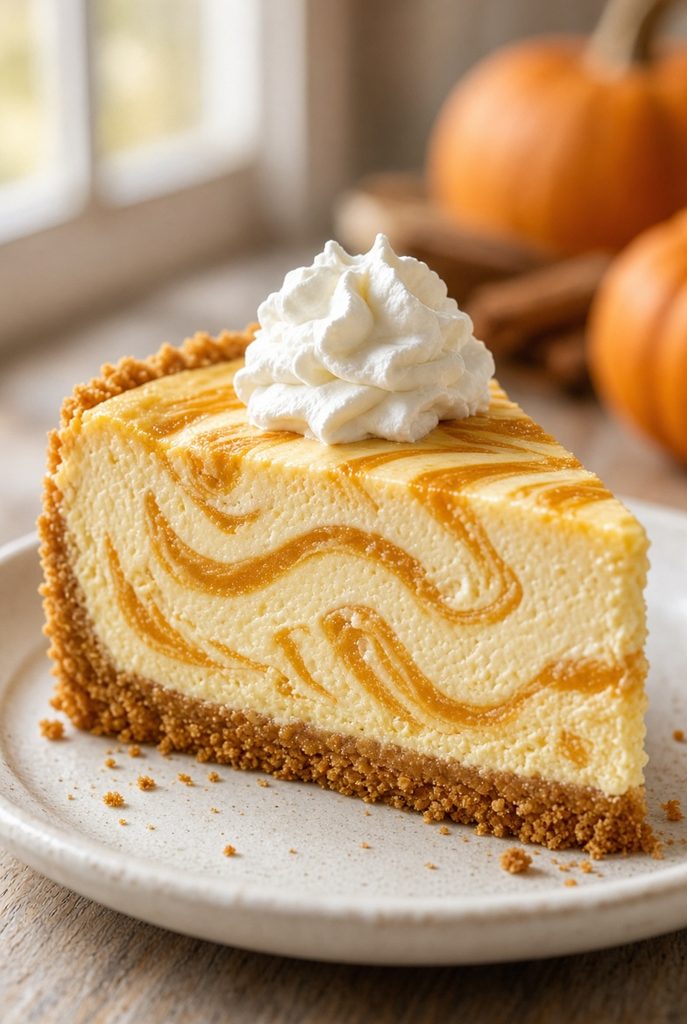
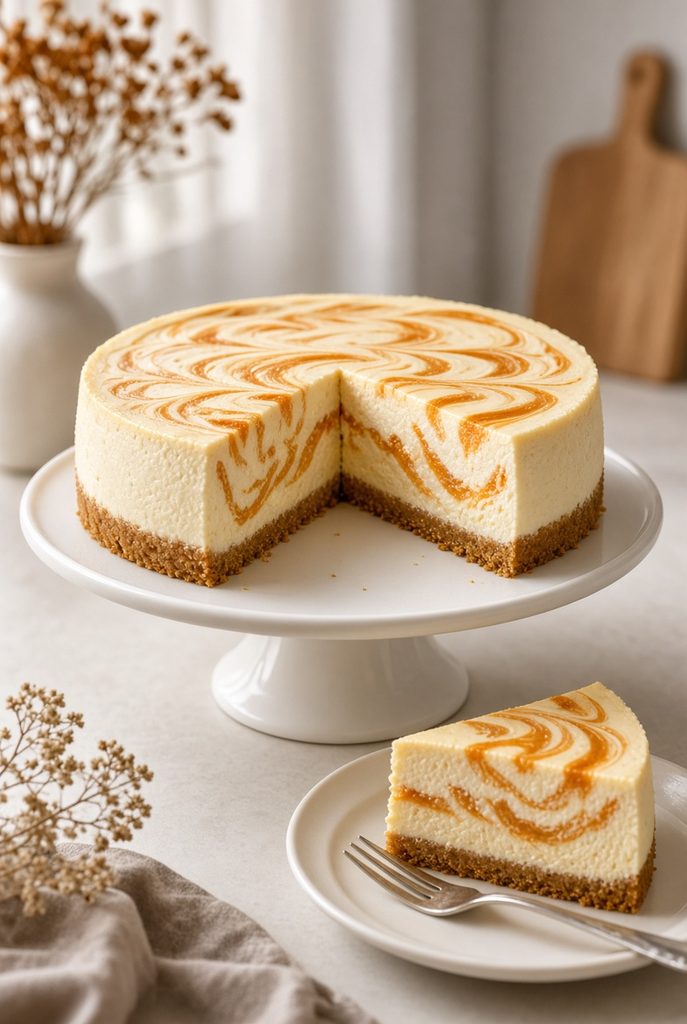
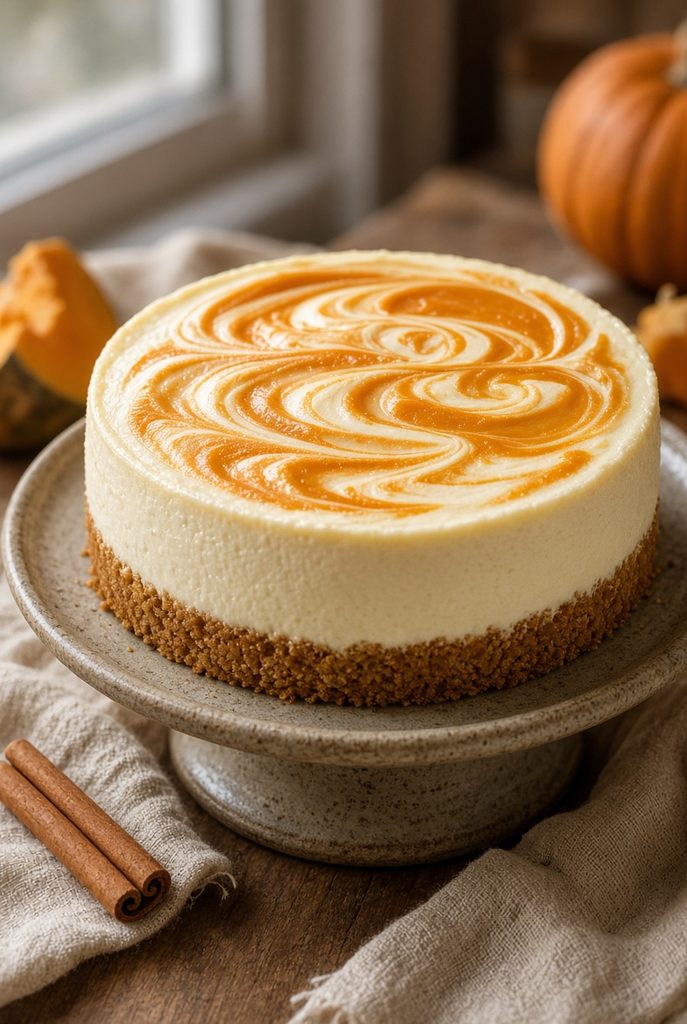
What makes this version different from a plain no-bake cheesecake is the swirl. Instead of mixing pumpkin straight into the whole batch of filling — which mutes the cheesecake flavor and turns everything one uniform orange — I keep a portion of the filling plain and vanilla-forward, then fold pumpkin and warm spices into the rest. When you layer the two mixtures into the crust and drag a knife through them, you get these marbled ribbons of pumpkin running through pale, creamy cheesecake. It looks like it took real effort, but the technique itself is simple enough for a first-time baker.
I also love that this is a genuine make-ahead dessert. Cheesecake actually benefits from time in the refrigerator, so this is one of the rare desserts where doing it a day or two in advance makes it better, not worse. For a Thanksgiving host trying to keep the oven free for the turkey and side dishes, that alone makes it worth adding to the rotation.
Why I Love This No-Bake Pumpkin Swirl Cheesecake
No oven required. During a busy fall week, or on a Thanksgiving day when the oven is already working overtime, being able to build an entire dessert on the stovetop and countertop is genuinely useful.
It comes together with basic equipment. You do not need a stand mixer, a water bath, or any specialty pumpkin-baking gear. A hand mixer and a springform pan cover almost everything.
The texture is closer to a mousse-cheesecake hybrid. Because the filling is lightened with whipped cream instead of set with eggs and baked, every bite is soft, cool, and creamy rather than dense.
The pumpkin swirl is genuinely pretty. I have made plenty of desserts that look better in my head than on the plate. This one photographs well without any special styling tricks.
It is a forgiving recipe for beginners. There is no worry about overbaking, underbaking, or a cracked top, which are the three things that intimidate people most about cheesecake.
It fits naturally into Thanksgiving planning. It can be finished a day or two ahead, which takes one entire dish off your plate — literally — on the day itself.
It still tastes like fall. Between the pumpkin pie spice, the cinnamon, and the graham cracker crust, it hits the same notes as a traditional pumpkin pie or baked pumpkin cheesecake.
It is easy to dress up or keep simple. A plain slice is good on its own, but it also takes well to whipped cream, chopped pecans, or a caramel drizzle if you want to make it feel more special for guests.
What Makes This Cheesecake Different?
A traditional baked pumpkin cheesecake relies on eggs and a low, slow bake to set the filling, usually in a water bath to prevent cracking. It has a denser, custard-like texture, and pumpkin is typically mixed evenly throughout the batter, so every bite tastes the same.
A standard no-bake cheesecake skips the eggs and the oven entirely. Instead, whipped cream cheese is lightened with whipped heavy cream, poured into a chilled crust, and set in the refrigerator. The texture is lighter and softer than a baked cheesecake, more like a cross between cheesecake and mousse.
This pumpkin swirl version takes the no-bake method and splits the filling into two parts. One portion stays plain and vanilla-flavored, keeping that classic tangy cheesecake taste front and center. The other portion gets pumpkin puree and warm spices folded in. When you swirl the two together instead of blending them into one uniform mixture, you get contrast — in flavor, in color, and in that ribboned look running through each slice. It gives you the best of both a cheesecake and a pumpkin dessert in the same bite, without either one getting lost.
Ingredients You’ll Need
For the Graham Cracker Crust
- 2 cups graham cracker crumbs (about 14–15 full sheets, crushed)
- 6 tablespoons unsalted butter, melted
- 3 tablespoons granulated sugar
- Pinch of salt
For the Cheesecake Filling
- 24 oz full-fat cream cheese, softened to room temperature
- 1 cup powdered sugar
- 1 teaspoon vanilla extract
- 1 1/2 cups heavy whipping cream, cold
Full-fat cream cheese matters here. Reduced-fat versions hold more water and are more likely to leave you with a softer, less stable filling. Powdered sugar dissolves smoothly into cream cheese without any graininess, which is why it is used instead of granulated sugar in most no-bake fillings. Cold heavy cream whips faster and holds its structure longer, which directly affects how well your finished cheesecake sets.
For the Pumpkin Swirl
- 3/4 cup pure pumpkin puree
- 1/3 cup brown sugar
- 1 1/2 teaspoons pumpkin pie spice
- 1/2 teaspoon ground cinnamon
- Pinch of salt
This is the most important ingredient note in the whole recipe: use 100% pure pumpkin puree, not pumpkin pie filling. Pumpkin pie filling is already sweetened and pre-spiced, and using it in place of plain puree will throw off both the sweetness and the texture of your swirl, often making it too wet to hold a clean shape.
Optional Toppings
- Whipped cream
- A light dusting of cinnamon
- Chopped pecans
- Caramel drizzle
Ingredient Substitutions
Crust: A store-bought graham cracker crust works in a pinch, though homemade gives you a thicker, sturdier base that holds up better once sliced. A gingersnap crust is a nice swap if you want extra spice — just note that gingersnaps can brown a bit faster if you choose to pre-bake the crust.
Graham crackers: Cinnamon graham crackers add a little extra warmth to the crust and work well here.
Whipped topping vs. homemade whipped cream: Store-bought whipped topping can replace the heavy cream you whip yourself, and it will hold its structure a bit longer at room temperature, though homemade whipped cream generally tastes richer and less sweet.
Dairy-free version: Full-fat dairy-free cream cheese and a dairy-free whipping cream alternative can be used, but expect a softer set, since these products do not always behave exactly like their dairy counterparts. Chill time may need to be extended.
Kitchen Tools I Recommend
- 9-inch springform pan — the removable side makes it possible to release a chilled, delicate no-bake filling without tearing it apart.
- Electric hand mixer — softened cream cheese and cold whipped cream both come together far more evenly and quickly with an electric mixer than by hand.
- Large mixing bowls — you will need at least two, since the filling gets divided into a plain portion and a pumpkin portion.
- Rubber spatula — essential for folding whipped cream into the cream cheese mixture without deflating it.
- Measuring cups and spoons — precision matters more in a set-by-chilling dessert than in a baked one, since there is no oven to help compensate for a slightly off ratio.
- Food processor — the fastest, most even way to crush graham crackers into fine crumbs; a zip-top bag and rolling pin also work.
- Offset spatula or the back of a spoon — useful for spreading each layer evenly before swirling.
Step 1: Prepare the crust
Combine the graham cracker crumbs, melted butter, sugar, and salt in a bowl until the mixture looks like wet sand. Press it firmly and evenly into the bottom of a 9-inch springform pan, using the bottom of a measuring cup to pack it tight. Pressing firmly matters because a loose crust will crumble apart the moment you try to slice through it later.
Step 2: Chill the crust
Place the crust in the refrigerator for at least 20–30 minutes while you make the filling. This gives the butter time to firm back up, which holds the crumbs together before any weight from the filling is added on top.
Step 3: Prepare the cheesecake filling
Beat the softened cream cheese on medium speed until completely smooth, scraping down the sides of the bowl as needed. Room-temperature cream cheese is the single biggest factor in avoiding lumps — cold cream cheese resists breaking down evenly, no matter how long you beat it. Add the powdered sugar and vanilla and beat until fully combined.
Step 4: Whip the cream
In a separate bowl, whip the cold heavy cream until it holds stiff peaks. Cold cream whips faster and holds its shape longer, which gives your filling more structure once it is chilled.
Step 5: Combine the filling
Gently fold the whipped cream into the cream cheese mixture in two or three additions, using a rubber spatula in a sweeping, scraping motion rather than stirring. Folding gently keeps the air you whipped in intact, which is what gives the finished cheesecake its light texture.
Step 6: Make the pumpkin mixture
Set aside about one-third of the finished filling. Whisk the pumpkin puree, brown sugar, pumpkin pie spice, cinnamon, and salt together separately, then fold this pumpkin mixture into the reserved portion of filling until evenly colored.
Step 7: Create the swirl
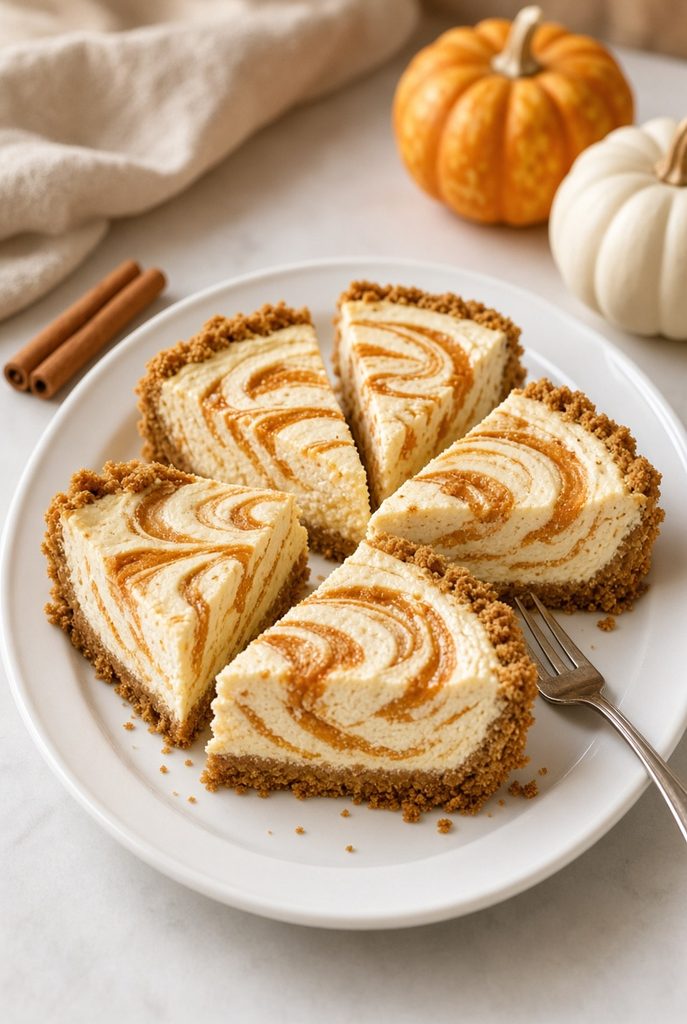
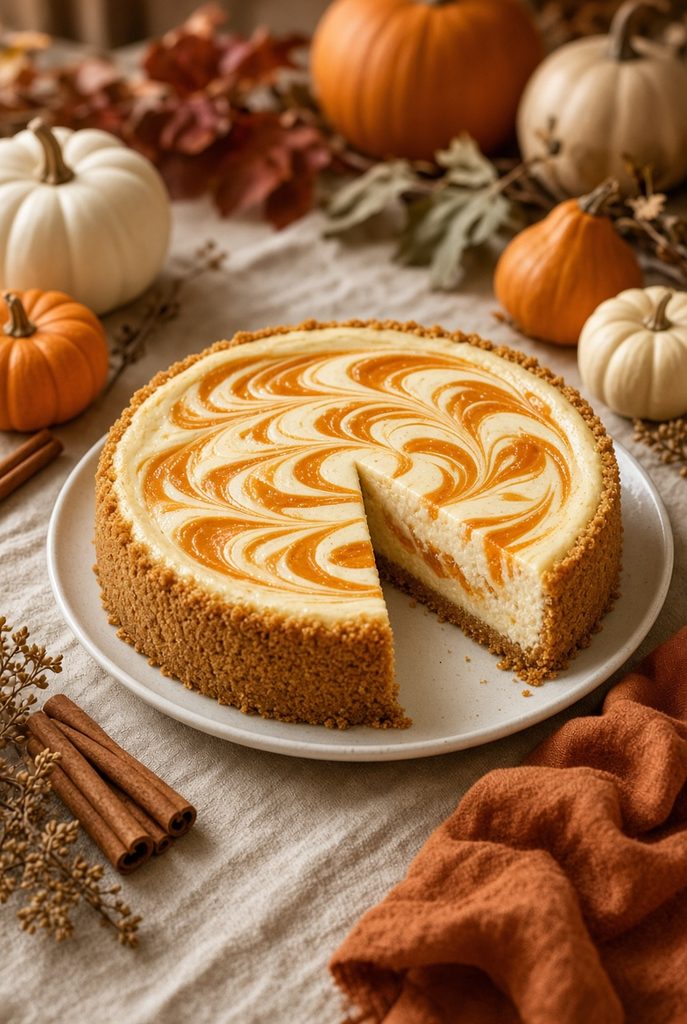
Spoon large dollops of the plain filling into the chilled crust, followed by dollops of the pumpkin filling in the gaps between them. Continue alternating until both mixtures are used. Drag a skewer, thin knife, or the tip of a spatula through the mixture in loose figure-eight or S-shaped motions. Stop as soon as you see defined ribbons — over-swirling blends the two colors together and turns the marbled look muddy and gray-orange instead of crisp and defined.
Step 8: Chill
Cover the pan and refrigerate for at least 6 hours, though overnight is genuinely better if your schedule allows it. This dessert depends entirely on chilling to set, since there is no baking step to firm up the eggs and starches. Rushing this step is the most common reason a no-bake cheesecake turns out too soft.
Step 9: Remove from the pan
Run a thin knife around the inside edge of the pan before releasing the springform latch. This loosens any filling that may have touched the sides, making for a cleaner release.
Step 10: Slice and serve
Use a sharp knife, wiping the blade clean with a warm, damp towel between each cut. This keeps every slice crisp instead of dragging filling across the swirl pattern.
My Best Tips for a Perfect No-Bake Cheesecake
- Use fully softened cream cheese — cold cream cheese is the number one cause of lumps.
- Whip the heavy cream cold, straight from the refrigerator, for the best volume and stability.
- Always use pure pumpkin puree, never pumpkin pie filling.
- Keep the pumpkin mixture from getting too wet; measure the puree rather than eyeballing it.
- Press the crust firmly and evenly so it holds together when sliced.
- Avoid overmixing the cream cheese once the sugar is added, which can thin the mixture out.
- Fold, don’t stir, when combining whipped cream into the filling.
- Swirl gently and stop early — a few clean lines look better than a fully blended pattern.
- Give the cheesecake the full recommended chilling time; do not shortcut this step.
- Use a springform pan so you are not fighting to release a delicate filling from a regular cake pan.
- Let the cheesecake sit at room temperature for about 5–10 minutes before slicing if it feels too firm to cut cleanly.
- Keep your swirling tool thin — a butter knife or skewer gives more control than a wide spatula.
Common Problems and How I Fix Them
Why is my no-bake cheesecake too soft? This is almost always a chilling issue. Give it more time in the refrigerator, ideally overnight, before deciding the recipe did not work. A filling that seems loose at hour four can be perfectly sliceable by hour eight.
Why is my cheesecake lumpy? Cold cream cheese is the usual culprit. Let it sit out until it is genuinely soft to the touch, not just less cold, before you start beating it.
Why is my graham cracker crust falling apart? This usually means either not enough butter or not enough compression. Make sure the crumbs feel like wet sand before pressing, and press with real force using a flat-bottomed measuring cup.
Why didn’t my pumpkin swirl look defined? Overmixing during the swirl step, or swirling for too long, blends the two colors into one muddy tone. A few deliberate passes through the layers is all you need.
Why won’t my cheesecake release from the pan? Run a thin knife around the edge before opening the latch, and make sure the cheesecake has chilled long enough to firm up. A filling that is still too soft can stick to the sides.
Why does my cheesecake taste too pumpkin-heavy? This usually happens if too much of the total filling was mixed with pumpkin. Keeping the ratio closer to two-thirds plain filling and one-third pumpkin filling keeps the flavors balanced.
How to Get the Prettiest Pumpkin Swirl
Getting a defined, photogenic swirl comes down to restraint. Spoon the plain and pumpkin fillings in alternating dollops rather than pouring them in, since dollops create more distinct pockets of color to swirl through. A thin tool — a wooden skewer, a butter knife, or the tip of a thin offset spatula — gives you more control than anything wide. Drag it through the surface in a handful of loose S-curves or a simple figure-eight pattern, working in one direction rather than going back and forth repeatedly. The moment you see clear ribbons of orange and cream, stop. Less swirling almost always looks better than more; it is a case where doing less gets you a more impressive-looking result.
Make-Ahead and Storage
This cheesecake is genuinely meant to be made ahead — it needs the chilling time regardless, so building it a day or two before you plan to serve it works in your favor rather than against it. Once fully set, cover the pan tightly with plastic wrap or transfer slices to an airtight container and store it in the refrigerator. It keeps well for about 3–4 days refrigerated.
Freezing is possible, though the texture will soften slightly upon thawing due to the whipped cream in the filling. If you do freeze it, wrap individual slices tightly and thaw them in the refrigerator overnight rather than at room temperature, which helps the filling firm back up more evenly.
How I Would Serve It for Thanksgiving
On Thanksgiving, I like setting this out as part of a small dessert table alongside a more traditional pie, since the contrast between a classic baked pie and this cool, creamy cheesecake gives guests an actual choice. A dollop of whipped cream and a light dusting of cinnamon on each slice dresses it up without much effort. If I have pecans on hand, a small handful scattered over the top adds a bit of crunch against the soft filling, and a light caramel drizzle turns it into something that feels a little more special for a holiday table.
It also works well for a smaller family gathering or a casual fall dinner where you want something pumpkin-flavored but do not want to commit oven space to a full pie. Because it can be finished well before guests arrive, it is one less thing to think about on the day itself.
How to Plan This Dessert Into a Busy Week
One of the reasons I keep coming back to make-ahead recipes like this one is that they make the rest of the week’s cooking feel more manageable. Knowing that dessert is already handled in the refrigerator means I only have to think about the rest of the meal, not everything at once.
If meal planning is one of those things you keep meaning to get better at, I recommend checking out Meal Planning Made Easy E-books. It can give you a more organized starting point instead of trying to figure out every meal from scratch, which is especially useful heading into a busy stretch like the weeks around Thanksgiving.
Building in a make-ahead dessert is a small piece of a bigger puzzle, but it is a genuinely useful one. Pairing a recipe like this with an actual plan for the rest of your meals is where the real time savings tend to show up.
Recipe Card
No-Bake Pumpkin Swirl Cheesecake
- Prep time: 30 minutes
- Chill time: 6 hours (overnight recommended)
- Total time: 6 hours 30 minutes
- Servings: 10–12 slices
- Category: Dessert
- Cuisine: American
Ingredients
Crust:
- 2 cups graham cracker crumbs
- 6 tablespoons unsalted butter, melted
- 3 tablespoons granulated sugar
- Pinch of salt
Cheesecake filling:
- 24 oz full-fat cream cheese, softened
- 1 cup powdered sugar
- 1 teaspoon vanilla extract
- 1 1/2 cups heavy whipping cream, cold
Pumpkin swirl:
- 3/4 cup pure pumpkin puree
- 1/3 cup brown sugar
- 1 1/2 teaspoons pumpkin pie spice
- 1/2 teaspoon ground cinnamon
- Pinch of salt
Optional toppings:
- Whipped cream, cinnamon, chopped pecans, caramel drizzle
Instructions
- Mix graham cracker crumbs, melted butter, sugar, and salt; press firmly into a 9-inch springform pan.
- Chill the crust for 20–30 minutes.
- Beat softened cream cheese until smooth, then mix in powdered sugar and vanilla.
- In a separate bowl, whip cold heavy cream to stiff peaks.
- Fold whipped cream into the cream cheese mixture in stages.
- Set aside one-third of the filling; whisk together pumpkin puree, brown sugar, and spices, then fold into the reserved filling.
- Alternate dollops of plain and pumpkin filling into the crust, then swirl gently with a skewer or thin knife.
- Cover and refrigerate at least 6 hours, or overnight.
- Run a knife around the edge and release the springform pan.
- Slice with a clean, warm knife, wiping between cuts.
Storage notes: Refrigerate covered for up to 3–4 days. Freezing is possible; wrap slices individually and thaw overnight in the refrigerator.
Frequently Asked Questions
Can I make this pumpkin cheesecake the day before? Yes — in fact, it is ideal made a day ahead, since it needs several hours to chill and set regardless.
Can I use a store-bought crust? Yes, a store-bought graham cracker crust will work, though a homemade one tends to be sturdier and holds slices together better.
Can I use pumpkin pie filling instead of pumpkin puree? No. Pumpkin pie filling is pre-sweetened and pre-spiced, which will throw off both the flavor balance and the texture of the swirl.
How long does no-bake pumpkin cheesecake need to chill? At least 6 hours, though overnight gives the most reliable, fully set texture.
Can I freeze no-bake pumpkin cheesecake? Yes, though the texture softens slightly after thawing. Wrap slices individually and thaw in the refrigerator.
How do I prevent a soggy crust? Make sure the crust is pressed firmly and chilled before adding the filling, and keep the finished cheesecake covered in the refrigerator rather than left uncovered.
Why is my cheesecake not firm? It likely needs more chilling time. Give it the full recommended time, or longer, before troubleshooting further.
Can I make this without a springform pan? You can use a regular pie dish, though releasing clean slices will be more difficult since there is no removable side.
What is the best way to get clean slices? Use a sharp knife and wipe it clean with a warm, damp towel between each cut.
Can I add whipped cream before refrigerating? It is best to add whipped cream toppings just before serving, so they stay fresh and do not deflate over a long chill.
Nutrition (Estimated, Per Slice)
Based on 12 servings:
- Calories: approximately 320
- Carbohydrates: approximately 24g
- Protein: approximately 4g
- Fat: approximately 23g
- Sugar: approximately 18g
This is an estimate only, based on standard ingredient values, and is not a substitute for precise nutritional analysis.
Final Thoughts
This no-bake pumpkin swirl cheesecake has earned a permanent spot in my fall baking rotation, mostly because it delivers everything I want from a pumpkin dessert without asking much of me on the day I actually need it. The crust comes together in minutes, the filling is genuinely hard to mess up once the cream cheese is properly softened, and the swirl makes it look far more impressive than the effort it actually takes.
If you are hosting this Thanksgiving, or just want a fall dessert that does not compete with your oven for space, I hope you give this one a try. And if you are looking for a bit more structure around the rest of your holiday cooking, Meal Planning Made Easy E-books is worth a look.
I would love to hear how yours turns out — the swirl pattern is a little different every time, and that is part of what makes it fun.
